

Building a Postal SMTP server to send bulk emails is an excellent choice for email marketers. Postal is a powerful, open-source mail server written in JavaScript and Ruby, backed by a large community of developers. It can be used to build in-house SMTP servers just like Mailgun, Sendgrid, or Mailchimp.
Postal installation is not very straightforward. The process is fairly complex because Postal requires several packages to be installed beforehand. However, I have tried to make this guide as simple as possible.
Requirements for Postal SMTP Server
- A domain name from Namecheap or Namesilo
- A VPS or cloud server with a minimum of 4 GB RAM and 2 vCPU
- Operating System: Ubuntu 22.04 or Ubuntu 20.04
I am using Contabo for this demonstration.
Initial Setup
To start the installation, you will need to connect to your server. If you are on Windows, you will need an SSH client like Putty. If you are on Linux or Mac, just open the terminal and type ssh root@xx.x.x.xxx (where xx.x.x.xxx is your server IP address).
First of all, switch to the root user:
sudo -iAfter that, update and upgrade your Ubuntu system:
apt update -y
apt upgrade -y
Next, set up the hostname. Replace yourdomain.com with your actual domain name:
hostnamectl set-hostname postal.yourdomain.comUpdating DNS Records
Log in to your domain registrar and create an A record for mail.yourdomain.com pointing to your server's IP address.
Now let’s begin with the installation.
Installing Docker and Docker-Compose
Recently, the Postal team switched to a Docker-based installation to make the process easier. Therefore, we need to install Docker and Docker-Compose first. I already have a detailed article explaining what Docker and Docker-Compose are; feel free to read it for a clearer understanding.
Installing Docker
First, install a few prerequisite packages to set up the Docker repository:
sudo apt-get install ca-certificates curl gnupg -yNext, add Docker’s official GPG key:
sudo install -m 0755 -d /etc/apt/keyrings
curl -fsSL https://download.docker.com/linux/ubuntu/gpg | sudo gpg --dearmor -o /etc/apt/keyrings/docker.gpg
sudo chmod a+r /etc/apt/keyrings/docker.gpg
Now, add the Docker repository using the following commands:
echo \
  "deb [arch=$(dpkg --print-architecture) signed-by=/etc/apt/keyrings/docker.gpg] https://download.docker.com/linux/ubuntu \
  $(. /etc/os-release && echo "$VERSION_CODENAME") stable" | \
  sudo tee /etc/apt/sources.list.d/docker.list > /dev/null
Update your system packages again:
sudo apt-get update -yFinally, run the following command to install Docker Engine and containerd:
sudo apt-get install docker-ce docker-ce-cli containerd.io docker-buildx-plugin docker-compose-plugin -yInstalling Docker-Compose
Download the current stable release of Docker Compose:
curl -SL https://github.com/docker/compose/releases/download/v2.23.3/docker-compose-linux-x86_64 -o /usr/local/bin/docker-composeNext, apply executable permissions to the binary:
sudo chmod +x /usr/local/bin/docker-composeCreate a necessary symlink:
sudo ln -s /usr/local/bin/docker-compose /usr/bin/docker-composeFinally, verify the Docker-Compose installation:
Explore a Premium Online Opportunity
Discover selected digital offers and online tools that may help you grow your projects, business, and productivity.
docker-compose --versionYou should see the Docker-Compose version. If you see an error, something went wrong during the installation.
Installing Additional Prerequisites for Postal SMTP
After installing Docker and Docker-Compose, you need to install a few other packages like Git, curl, and jq.
Install them using the following command:
apt install git curl jq -yNext, clone the Postal helper repository and create a symlink:
git clone https://github.com/postalserver/install /opt/postal/install
sudo ln -s /opt/postal/install/bin/postal /usr/bin/postal
Installing MariaDB
Now, install MariaDB in a Docker container:
docker run -d \
   --name postal-mariadb \
   -p 127.0.0.1:3306:3306 \
   --restart always \
   -e MARIADB_DATABASE=postal \
   -e MARIADB_ROOT_PASSWORD=postalpassword \
   mariadb
⚠️ Note: RabbitMQ is no longer required in the current version of Postal. Therefore, that part has been removed from this article.
Installing Postal
The Postal repository you cloned earlier is capable of generating the necessary configuration files. Run the following command:
postal bootstrap postal.yourdomain.comThe above command generates 3 files. Out of these, postal.yml is our main focus.
You need to edit postal.yml to make changes. But first, install a text editor like nano:
apt install nano -yNow, open the postal.yml file:
nano /opt/postal/config/postal.ymlYou will see output like this:
version: 2

postal:
  web_hostname: postal.yourdomain.com
  web_protocol: https
  smtp_hostname: postal.yourdomain.com

main_db:
  host: 127.0.0.1
  username: root
  password: postalpassword
  database: postal

message_db:
  host: 127.0.0.1
  username: root
  password: postalpassword
  prefix: postal

smtp_server:
  default_bind_address: "::"

dns:
# Specify the DNS records that you have configured. Refer to the documentation at
# https://github.com/atech/postal/wiki/Domains-&-DNS-Configuration for further
# information about these.
  mx_records:
    - mx.postal.yourdomain.com
  spf_include: spf.postal.yourdomain.com
  return_path_domain: rp.postal.yourdomain.com
  route_domain: routes.postal.yourdomain.com
  track_domain: track.postal.yourdomain.com

smtp:
# Specify an SMTP server that can be used to send messages from the Postal management
# system to users. You can configure this to use a Postal mail server once the
# your installation has been set up.
  host: 127.0.0.1
  port: 2525
  username: # Complete when Postal is running and you can
  password: # generate the credentials within the interface.
  from_name: Postal
  from_address: postal.yourdomain.com

rails:
# This is generated automatically by the config initialization. It should be a random
# string unique to your installation.
  secret_key: 2f271404e1fac638bf546b0ee4b6485c713351aba71291ae55253f345d0dc045c0450a5750e7ca2bbd2068628d5a2253454cca352c46ea9d9804ed59cbe8a027b24dc74bcadd3b50ae21138a61d344609d13f0875caf21c53681e5289868194f756a8c34e2409b8ec92e3e149c13fe4e08dc6cbdb04bb02bc8943d1ff8faeae6
Make sure to modify the database passwords in the file above. Cross-check the other settings, then save and close the file by pressing CTRL + X, then Y, then Enter.
Initializing the Database
Initializing the database is super easy. Just execute the following command, and you will see the database tables being created in the output:
postal initializeAfter that, it’s time to create the admin user:
postal make-userYou will be asked for an email address, name, and password for the admin user. Fill in the details and proceed to the next step.
Starting & Running Postal
Starting Postal is also super easy. Just run the following command:
postal startYou can check the status of Postal at any time using:
postal statusInstalling Caddy (SSL)
This is a feature added by the Postal team to install an SSL certificate automatically. Run the following command:
docker run -d \
   --name postal-caddy \
   --restart always \
   --network host \
   -v /opt/postal/config/Caddyfile:/etc/caddy/Caddyfile \
   -v /opt/postal/caddy-data:/data \
   caddy
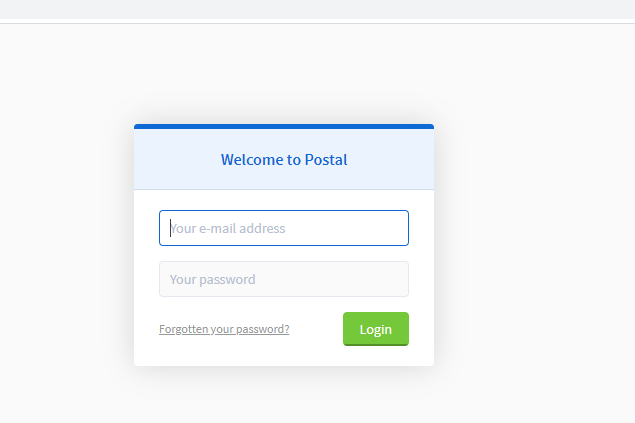
Now you can go to https://postal.yourdomain.com and log in using the admin credentials you created earlier. You will see the admin page:

Questions & Comments
Ask something about this post or request help from the community.
No comments yet. Be the first to ask a question.